Showing posts with label kitchen. Show all posts

Thursday, November 17, 2011

Day 305- Devil's in the Details

Many couples are not able to renovate together. My parents, for example, fought over how many electrical plus were needed in the kitchen. So growing up, we literally had a plug every 2 feet. They were all used, so I don't really see how that's a problem. The main thing was that plugs were what throw-downs were made of in my family.

Hubbs and I have had a relatively easy time picking out what would go into the kitchen. Granite? 1 day process to choose. Tile floor? 30 minutes and ohhh! Home depot clearance! Cabinets? We want white, what's the best price?

Back splash? Cabinet pulls? Faucet? We'd come to a screeching halt. Part of the problem is that we are too close to Christmas and all I want for Christmas is something glittery. <--- This isn't my normal MO. The other part of the problem is that we are pooped by making so many design decisions.

After several weeks of deliberations, here are the finishes that we have chosen to far:

Pulls--


We visited a local hardware store that has over 5000 pulls only to find ones we like from Restoration Hardware. And because I am cool, I spent 2 hours looking up coupon codes because I thought it would be really expensive to get hardware there.  In the future,  I highly recommend LOOKING AT THE WEBSITE FIRST. Yeah.... they were having a 20% off sale. Which was advertised right on the front page of the website. My bad.

Here are our pulls: Grafton by Restoration Hardware.


The best part is they come in 3 inch, 4 inch, 6 inch and 8 inch; so we could get all the same hardware and adjust sizes per cabinet. And Will schmoozed it up and got us free shipping on all hardware. 

Faucet-

Will went by himself with the following directive: silver, pull out sprayer and one hole. Wow.... this whole post is just begging for dirty jokes. Anyway, after wandering through the store for 2 hours, and looking online with me for close to four (not in that order) he came home with this beaut:


Note: We didn't install the soap dispenser or that large bottom plate. This was so it would fit in the huge sink that we bought. We are brave, but no brave enough to drill a hole in a 134 pound sink that could crack. No siree!  The faucet is Lindsey by Moen.

And just to make me extra fancy, I found this faucet on Moen's site:


They look very similar, right? Well, I feel fancy and flush with cash, as they have a $300 difference!


So, there are some of the details. Now, I'm off to paint considering my roller is thawed out. 


PS- Still working on backsplash. But we are taking ideas!

Friday, November 11, 2011

Day 299- Tool Time

Hey everyone, you know what time it is? TOOL TIME.

I was thinking about Trading Spaces (did anyone else watch that?), and how they always had a $5000 budget. Sometimes you got awesome new floors, other times you would get a room covered in moss, thanks Hildi! But the thing that always really got me is that they didn't have to pay for the several THOUSANDS of dollars in tools. I mean, Ty was out there with a pricey table saw, it's not like I can build a hutch with a hand saw and keep my sanity.

When Will and I started this project, I thought we were doing pretty well with tools. We already had:

- sawsall
- two power drills & 1 baby one for small projects
- one circular saw
- two hammers
- a rocket level and a four foot level
- numerous screw drivers
- Numerous wrenches, including a graduated set
- chalk lines
- Pry bars
- 2 tape measures

And various other little things. Note; these are all now strewn across the house. Someday they might make it home.

We already those tools, but we had to buy another circular saw (the one we had was eating through batteries like crazy, so we got a corded saw), a tile saw, mortar paddle, float, electrical screw drivers (safety first!) and floor scraper.

Enter Dad. I've mentioned before that my dad is a general contractor, so his garage is literally full of tools. And he mailed them out to us!


Now we have a jigsaw, router, hand sander, belt sander, bottle jack and another drill. It was like Christmas!

My point is; sometimes I think the extreme cost of home renovation is based on the need to have a room full of tools.

Wednesday, November 2, 2011

Day 290- Azul Platino

No, I'm not becoming bilingual (although that does say blue platinum), that's the name of our counter tops.

Hubbs outright rejected my plywood counter tops, but I am determined to make a table or bar or something with the plywood and copper treatment. So we went with granite instead. And the name of our granite is.... Azul Platino. 


That is our actual slab. And it went in today. 

By the end of this week I will be doing the cabinet reveal,  but be aware that we are without pulls. 

Tuesday, November 1, 2011

Day 289- Back on the floor

First off, I apologize for my absence, we finished the cabinets and I lost the camera cord, so you can't see the kitchen right now. But I will talk about the floor.

As I talked about here, we brought the kitchen down to it's studs. If you look at the linked post you can see our former kitchen floor in all it's wrecked glory. Hubbs and I spent many a weekend removing the linoleum,
Ok, so TECHNICALLY I'm removing the counters, but the lino is gone too

 then the rotting MDF,


 then the rotten plywood.


Our house would have failed OSHA safety regulations for sure. Now we have to build it back up (buttercup).


Hole in the floor BEGONE! 
Before my dad came out, Will and I were planning on making a mortar bed for the cement board. Cement board is great because it only hardens with moisture. We've already tested the boards by spraying water from the hot water pipe all over the room, and they seem to be ok. Moral of the story? ALWAYS know where the water main for your house is located, and those five gallon buckets are your friend.  Once Dad was here, however, he said we didn't need a mortar bed, because the plywood was mostly even. Level? No. Even? Yes. Instead, he recommended that we use roofing paper as a water barrier, then install the cement board on top.

Thus, we pulled out our handy dandy staple gun.... to find out we didn't have staples. So we hit up HD for staples, and they don't sell the staples for our current gun, and we had to buy a new one. Watch out furniture, I've got my eye on your old cushions.

Now that the holes in the floor were sealed up, we rolled the paper out and leaving 4-6 inches of overlap, stapled that bad boy to the floor:

Other awesome things about heavy duty felt? It's really easy to lift a shoe print. So don't commit a crime where this is on the floor. Oh, and I could felt the floor all on my own. Sweet!

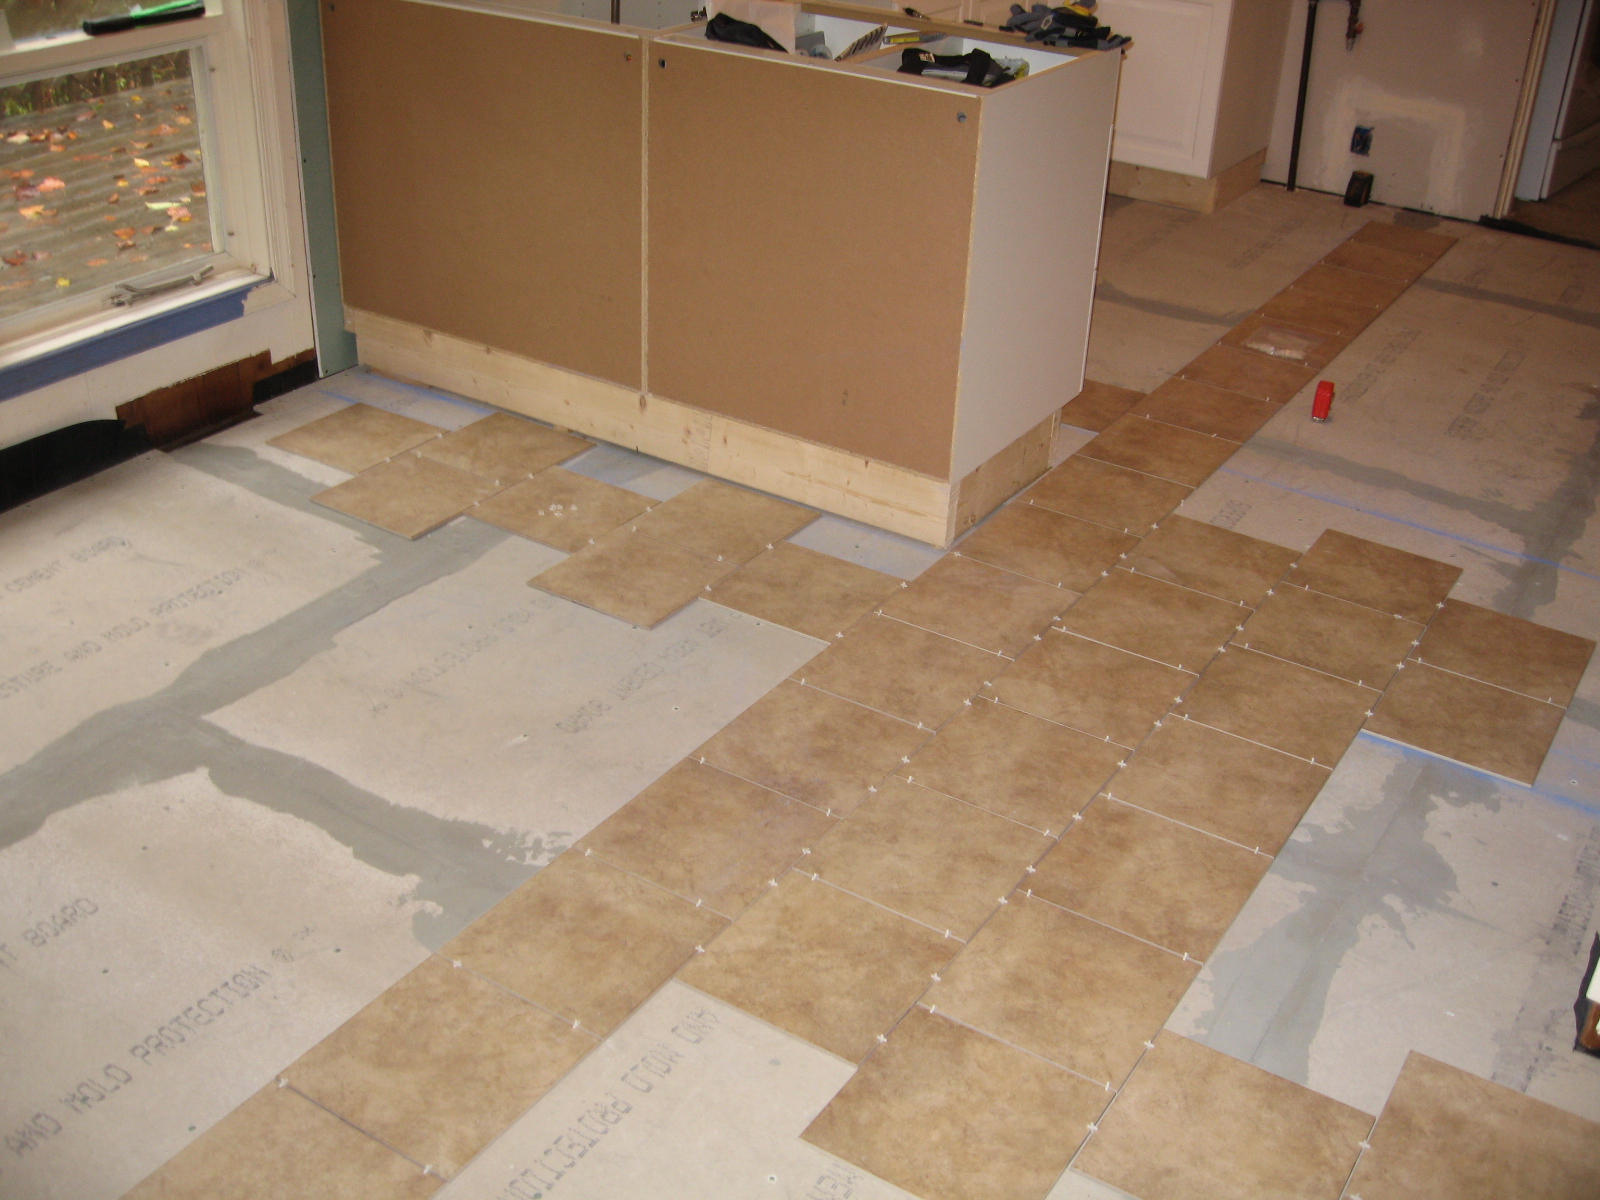
Once we were all felt up (oh, yes) we proceeded to lay the cement board. We chose to use hardibacker cement board; it's more expensive, but also looked much stronger in the store. As in, the corners weren't crumbling. The rule with cement board is that four corners are never to come together, and that includes the sub floor. We chose to lay the hardibacker perpendicular to the direction of the plywood under base. 


Here's the bucket of screws we used. Pay special attention to the number on that bucket. That 800 number. And we had to go buy more. On the upside, I am totally using that bucket for painting trim. Oh, it's the little things in life. 


Once the hardibacker was attached with all 900 screws we went ahead and mortared the seams. I guess the hardibacker acts as a floating layer. Plywood doesn't move, hardibacker needs to be able to expand and contract with weather, so by mortaring all the seams we created one large base instead of 22 little ones, so our tile shouldn't crack!


Then we installed the cabinets (more on that later), and we are ready for tile. We actually picked up the tile week one of owning the house, before we knew that the whole kitchen had to come out. So here's hoping it winds up looking ok!


Offset pattern 
Showing off my buttering skillz


Tomorrow the granite comes. That means by Friday I might be able to wash stuff in my SINK. 

Monday, October 24, 2011

Day 281- Well, lookie there

It was a long week of assembling, gluing and in one case, disassembling. In total we purchased 9 cabinets and it took a full week to get them together. Some of the cool things about Ikea is that we were able to purchase lazy susans to fill the space. Now we have less dead space and more storage. We don't have any normal lower cabinets, actually. More on all that later. 

We did get the wall cabinets in and my are they pretty. Ikea also has this cool system where you hang a metal strip on the wall and then hang the cabs from that strip. Easy peasy, right? Well, yes, except our brand new drywalls aren't completely level so it required some tinkering.

Three down
As you can see in this picture there is at least one level in the room. If I'm being really honest, I will tell you that hanging the cabinets required three levels. A four foot, a rocket and laser level. That laser level was hanging out in the pantry on top of the sugar jar. It has a sweet tooth. You'll also note, because we are really cool, that we have the directions stapled to the wall. We were worried that we would miss a step. 

Wait, let me make sure they are level again
At this point, the Hubbs looked over at me (I was on the floor assembling yet another box) and asked what we were missing. To which I responded "base cabinets, paint, tile, trim, a sink....". But his point was, all the sudden our kitchen was starting to look like a functional kitchen again. And what I thought was the laser level blinding me was really the light at the end of the tunnel. That's right, I'm going to cook something in this house soon. BRING IT ON PAULA DEEN!! And I might get to do dishes in a sink! Not a bathtub, a real honest to goodness sink. 
There we are, three cabinets down, 6 more to go. But we didn't stop there, oh now. We hung to more. Thanks levels!! Those five cabinets are within 1/16 of an inch from each other. They are nothing if not precise. I say: the floor is sloping, but my cabinets are straight!

Uppers. Up. Ers
Oh, and I think that we will have a functioning kitchen in 2 weeks. Saaaaweet!

Thursday, October 20, 2011

Day 277- Itchy scratchy

Now that we are plumbed and wired, it time for some walls. I know, more walls. I'm one of those strange people that enjoys walls on all sides. So there you go.

So Saturday morning, our kitchen looked like this:

Kitchen part of the room

Where the breakfast nook will live

Prior to adding drywall, I hung the rest of the insulation and had a grand ol' time with the spray foam. As I've mentioned 700 once or twice, there was a problem with mice. So we spray foamed the crap out of any entrance to the kitchen from below. It was really fun in a "I like baking soda and vinegar volcanoes" kind of way. 

Also in my infinite wisdom, I chose to wear crocs while hanging insulation. Crocs with holes on top.

I would not recommend doing this again, as the fibers from insulation will get into your shoes and make your feet itch for days on end. So needless to day, I was doing a strange little tap dance while hanging drywall for the day. And the even better part is that I was wearing them yesterday while working on the floor and my feet still itched when I went to bed. My crocs are getting a bath. I would show you pictures of me hanging drywall and insulation, but my husband thought it would be hysterical to enlarge the already ripped hole in my work pants. Instead of changing, I used knee pads to keep my pants around my leg. Again, classiest lady ever. Right here. 

Then we hung the mold resistant drywall (because there will be a sink, dontcha know) and we are ready for cabinets!


Tuesday, October 18, 2011

Day 275- On or off? On or Off?

Hot on the heels of our plumbing extravaganza, we had the electrician come and get us all wired and up to code (extra points if you got my lame pun). The Hubbs and I figured if we have the walls open already, lets go ahead and get under cabinet lighting run to a light switch. Because, obviously, that's classier then using up wall sockets, I mean c'mon. But I digress. There are many things that I am comfortable doing and using my good friend Google to figure out; running wiring off a light switch isn't one of them. We also had some wires just sticking out of the wall, where the microwave/hood/ 1960s over stove monstrosity was previously. My apologies, I don't have any pictures of the stove before we bought the house, it was removed as a part of negotiations prior to closing. So we needed to figure that out as well. Oh, and there was the little light switch debate as well.

For those of you who don't want to read that wall-o-text

1) Run wire to a light switch for under cabinet lights
2) Rerun vent hood/built in microwave line
3) Move the silly light switch

Friday, the electrician arrives and informs me that:

1) We can run this no problem, but since we are going to use LED lights, we have to run a driver to fix the voltage
2) The microwave needs it's own circuit, but we are getting some beefy plug additions to the kitchen too.
3) We have to pull more walls down to get the light switch moved.

Let's talk about this light switch for a moment. There are two lights in our kitchen, one switch is by the side more that was painted shut and required 200lbs of force to open. The other was by the side room that was a sunroom.

In other words, we would have to walk way to the corners of the room to turn on kitchen lights. This is annoying. Again, we have walls open and this is about making the kitchen work for us, so we are moving the switch! So we added one to the entrance by the dining room. Which is where the main flow from the house into the kitchen will come from.

So in short; we are up to code, will be well illuminated and can easily command the power of electricity from a more convenient entrance.

Monday, October 17, 2011

Day 274- Hold onto your butts

We bought the house 2 months ago. We haven't had a kitchen since. We have, however, had mice, a snake, crickets, skeeters, stink bugs and two trips to urgent care. The Hubbs and I have been working on the house by ourselves, with a little help from my Dad and lots of support from family. In this time, we've had little obvious progress, yes we knew what work had been done, but if a stranger came by it just looked a mess. This all changed this past weekend. Within three days we went from a big empty room with a wall still open to a enclosed space with upper cabinets installed. Hooooooly crap!

So this week I will be bringing updates for each of the little things we've done over the previous week. I warn you, it's gone from "oh we ripped up MDF for 12 hours" to "we insulated, drywalled, taped, assembled and hung cabinets".


So as I said. Hold onto your butts, it's about to get serious up in here!


~~~~~~~~~~~~~~~~~~~~~~~~~~~~~~~~~~~~~~~~~~~~~~~~~~~~~~

When we bought the house, we knew that there was some water getting into the basement. There were three suspects in the matter:

1) The foundation was leaking
2) The kitchen sink pipe was leaking
3) The gutters were so full that water was running into the basement instead of down the downspout

And the winner is................

The kitchen sink! The Hubbs was in the basement doing something when I was running water in the old sink, and he could hear it running out in the basement. So he ripped open the walls and found this:

That looks nice and solid


Yes, that is a hole in the pipe that rusted out. That's gotta go. But we weren't in a hurry. We have a bathtub to wash dishes!

Now that we are further in the reno, we decided it was time. Time to fix the pipes. Since we forced the seller to give us a home warranty, I just popped online and reported a plumbing problem. Two days later we had a plumber out and got the follow news;

1) The whole pipe is corrugated steel and likely  is rusted shut (think of arteries and cholesterol)

Guess how AWESOME the basement smelled. Just guess!


2) Whoever did the last fix, likely because the pipe is rusted shut, didn't tie the PVC into the air vent, meaning not only do we have a 2 inch pipe closed to .5 inches, we there's no suction to help.

3) The PVC portion of the pipe isn't on a downward slope and is full of water and old food stuff. Um, delicious?

4) All of the steel piping has to come out for a proper fix.

Luckily, our plumber is awesome and got all but $120 covered by the warranty. Thanks John! So on Friday he was out replacing all the pipes and running lines so that our kitchen sink would drain like a dream.

So we went from this:

See the multiple pipes and danglies?

To this:


Down to one pipe


And no danglies!
Oh, and we removed the extra weird pipe that was sticking out of the wall. But that was all Hubbs and his Sawsall. Gotta love a handy man!

Now that water is going to FLY through those pipes. Step one DONE.

Tuesday, October 11, 2011

Day 268 - To the window. To the WALL

Walls. I has them. Sort of.

When I last left you, we had just gotten the dryer to vent outside. Then I was taken over by the urge to wash the pile of clothes that had accumulated everywhere in the house. This project took a whole week. And there is another pile waiting to be washed and dried. Almost like the clean laundry is mocking me.  But I digress.

This weekend we had the big things happen:

1) We finished cement boarding the kitchen floor- Now it's ready for tile.
2) A paint color for the walls has been chosen. We think. I have several patches around the room that we are still trying on. But we are on day three and I still think it's the one!
3) We started to hang drywall.

But Carrie, you ask; why do you need to hang drywall?

This:

It's certainly a look
All of this lovely tin tile back splash was adhered with mastic. Which means we couldn't scrape it off and try again with tile and thin set. 

And this:
I don't need poop in my walls
 When we were working on the plumbing, I kept catching the delicate aroma of urine, and as it turns out, we found the other mouse nest. This is 4 inches from the ceiling, and they had tunnelled up through the insulation to the nest. So all the insulation and thin plywood came down so we could bleach and mitigate the problem. (As an FYI, I stuffed steel wool into all the available openings in the floor and near the pipes. Knock on wood, I haven't seen new droppings since. But it's getting to be winter time.)

Here I am, working on the house. The Hubbs thinks it's hysterical when I have all the gear on. Safety first!


Getting rid of the trim

don't forget the safety gear!

Down to studs. Again.
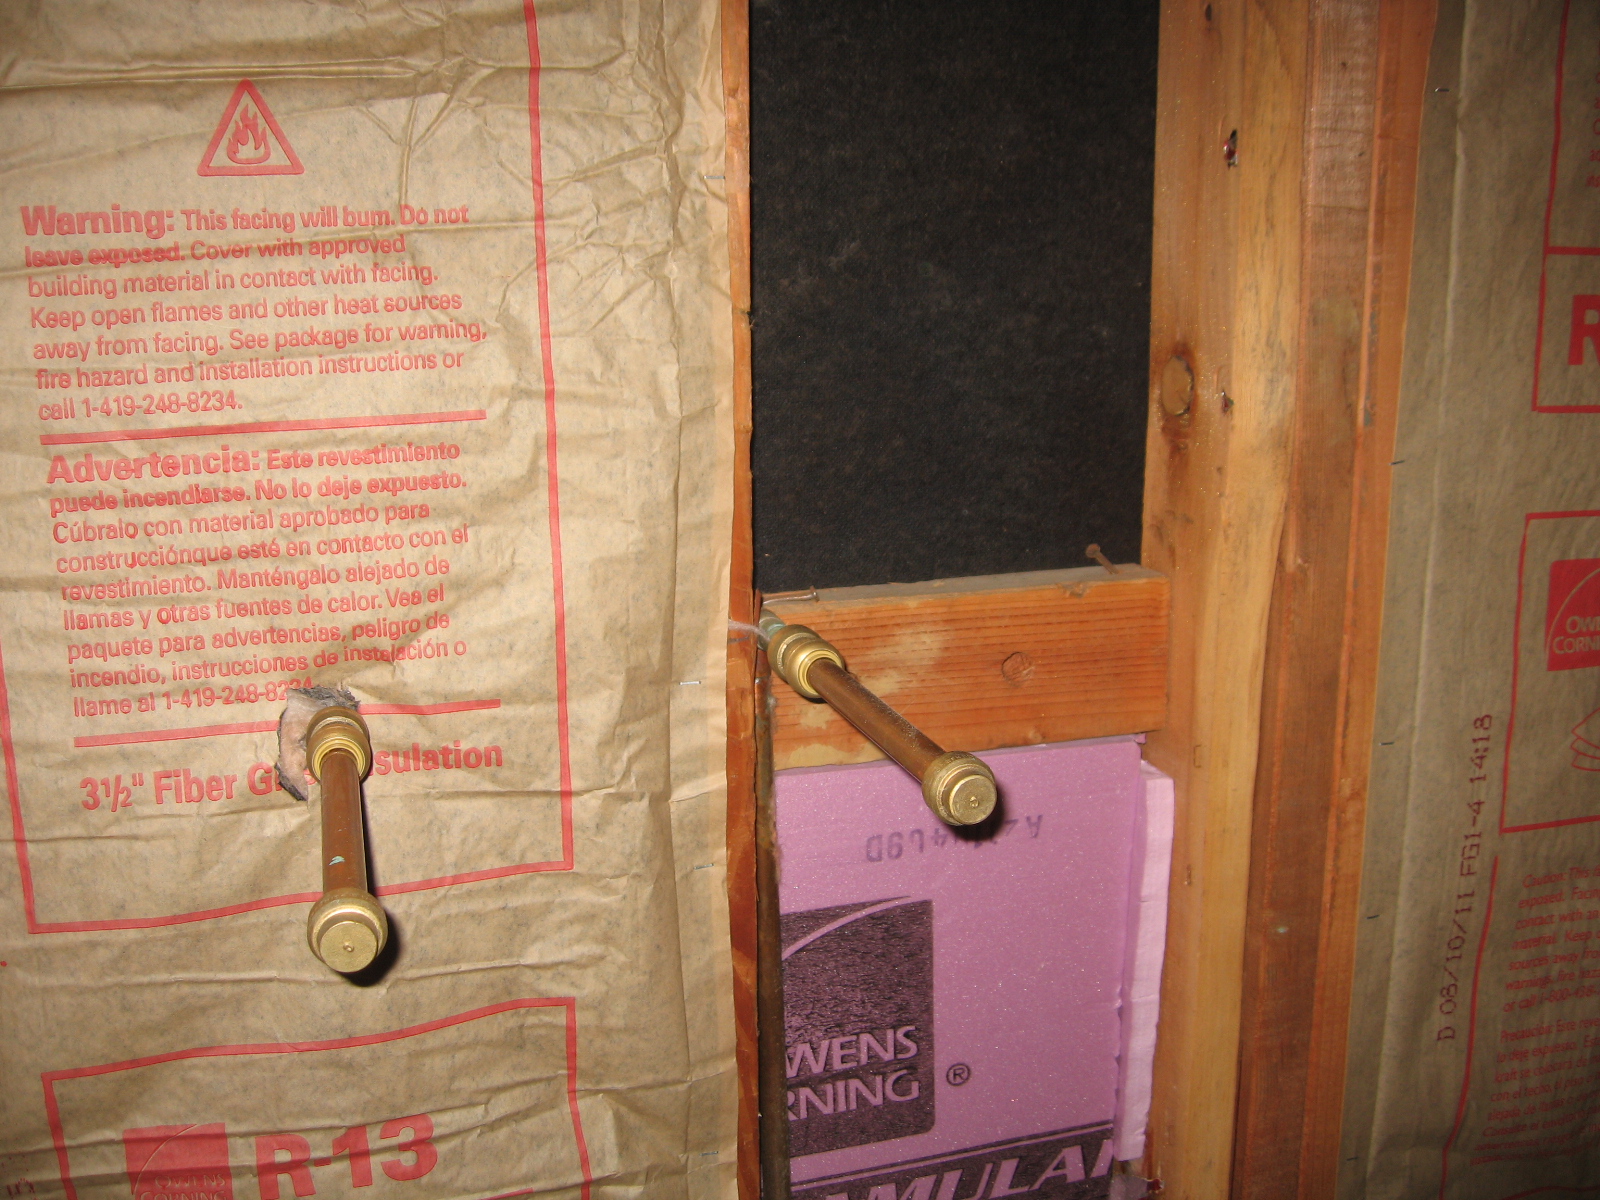
So now all the panelling is down and we are once again down to studs. But it's ok, because now we can air out the mouse nest and I sprayed bleach all over the walls to disinfect. It's much better now. This all happened before my Dad, the general contractor, came to visit. He took one look and told us to scrap all the old insulation. It wasn't R13 and wouldn't give us enough insulation in the winter, or summer for that matter. I don't recommend ripping down walls to add better insulation, but if they are down, why not? a 60 foot roll is $10 and will be worth it, so when in doubt... Pad it out. Sorry, that was lame. 


So while Will trimmed the last of the cement board, I started to instal our new, state of the art R13 insulation. Just me, my tape measure, razor and staple gun. Maybe I'm a total weirdo, but I had a lot of fun stapling away. Like this was MY wall to seal up. 

Once I was done with my insulating, I went back to the floor while Will trimmed the dry wall. We then scootched it up to the wall and drove it in place. And voila! One wall down, one more to go!


You may have noticed that we don't have seams taped yet, we are waiting on the other wall to go up and tape all at once. Plus, this will all be covered with cabinets and backsplash, so we aren't too worried!


Monday, October 3, 2011

Day 260 - Progress, finally

As I've mentioned, we didn't want to demo the kitchen when we first moved in, we wound up doing the demo out of necessity. But we are finally making some progress:

- We've chosen a sink and cabinets
- The plumber (covered under home warranty, woot!) is coming to fix the hole in the pipe.
- Layout for the cabinets is going on the floor this weekend so we can begin to tile
- Replacement of insulation is going up this week


I haven't mentioned that we ripped out some wall covering while removing the upper cabinets. At the time it was too depressing to finally close the hole in the floor only to open up the walls, but that's what happened. It wound up being needed, as we found yet another mouse nest and entry site. So out with the old insulation in with the new ( I confess, the new is still sitting in a roll on the floor, but we have it!). In addition, we had our first cold snap this weekend, and realized that we should replace all the insulation with a better thickness type, hence our little daytime project.

You'll notice, no where on that list is a counter top selection. While we would love to throw some quartz on there and call it a day, our frugalness is getting the better of us. We could go buy some cheapie laminate, but that's an awful lot of plastic to buy all at once, so we went back to the drawing board.

And now we have an idea that will take care of two things:

1) It will provide the base for quartz when we get around to buying counter top
2) It's inexpensive <--- We are huge fans of inexpensive things!

That's right ladies and gentlemen, we are going to use plywood as counter top. Please note we will poly the crap out of the plywood and make a pretty design under the poly, but it should be ok. Keep your eyes peeled for our project in the (hopefully) near future!

PS- We got a laser level this weekend... Oh my, disaster.

Wednesday, September 21, 2011

Day 248- Kitchen Demo

Since we moved, the Hubs and I have been working furiously on the kitchen. Being plastic free while renovating a kitchen is basically impossible. For two reason:


1. We have nowhere to prep food, so most of our eating comes in the form of take out or prepackaged foods. I never get heartburn, but 4 weeks of eating out all the time will make your heart feel like a ghost pepper. 


2. We are doing the renovation ourselves. Hubs and I, and our four hands. Buying plywood and backer board is very plastic free, but buying tools and blade replacements is very full of plastic. We do our best to buy as little prepackaged equipment as possible, but sometimes you have to buy a 7" circular saw replacement, and it comes in one of those hermetically sealed plastic containers. Because heaven forbid that saw blade get germs on it before I cut my rotting plywood! Anyway, my daily trips to Home Depot haven't been plastic free, but we are still trying. 

So, let us talk about where we are in the renovation.


Here are some terrible pictures of what we started with in the kitchen:


Cooking area and (brown) sink

Breakfast nook

I know, how on earth could we possibly want to change this at all? The linoleum! The brown ceramic sink! The stove original to the 1960s?! Well, the stove didn't work, the floor was rotting and I don't have a good excuse for the sink, other than it wasn't attractive. So into the dumpster it went. 

 We knew that we wanted to have tile in the kitchen for durability, so I started scouting Home Depot. Many times they will have tile on clearance, and it was simply a matter of snagging a color we liked. Once we found tile, we knew it was time for the linoleum to come up..... And so began the problems. 

First we took up the kitchen linoleum. It was really easy, we scored the surface with a utility knife and then poured hot water all over the floor, followed up buy some scraper usage to remove the old linoleum (don't worry, we also checked to make sure there would be no asbestos particles due to removal). Well, under the that first layer we found soaking wet MDF as a sub floor. Okaaaaaayyyyy.... 


Well, this doesn't look good at all!

See that hole? It's been there for a month


Why is this floor wet? That's so strange. So the Hubs pulled out the dishwasher to find out if it was leaking. Turns out, it was leaking mouse nests. So now we have to remove the MDF and all the base cabinets because they are soaked in urine. Great. Out come the counter top and cabinets. And while we are at it, let's figure out why this part of the floor is soft, so Hubs opened up part of the floor where the cabinets used to be to find out that the plywood underlayment is also rotted. That was a month ago. 

Here are some progress pictures:

See the rotting plywood on the right?

Working on the last little bit under the pantry

Classy solo-cup drip catcher

Now the fridge won't fall through into the basement
As of yesterday, we finally closed up the hole in the floor and no longer have to worry about someone falling through the floor into the basement. So we are FINALLY making some progress. Who cares if we have a fridge in the dining room?! That's how we roll!

Next step is to get hardiback or cement board on top of the plywood and think about new cabinets. Has anyone used hardiback or cement board? Which one is better? What do you think for cabinets? Thoughts on paint colors?


**Solo cups are have been moved halfway across country and are 3-4 years old. No new plastic!